Locate the Filezilla program on your "programs" menu and click on it to bring it up.
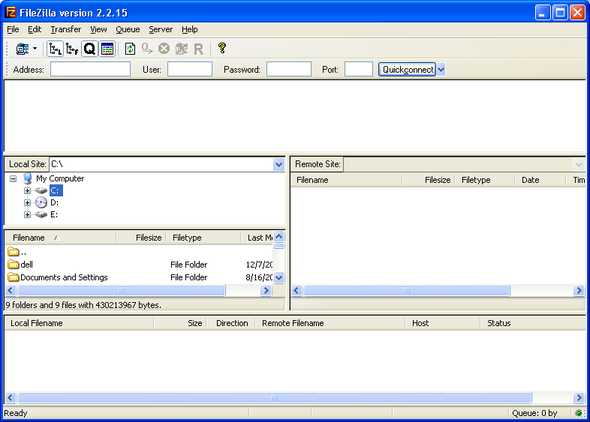
Now for a little tour of the Filezilla window. At the very top is the menu, below that are some buttons for frequently needed operations, below that is an address bar. These items will be used to operate the program.
The main part of the window is divided into three horizontal sections.
The top section that goes all the way across the window is the "message window." This window echos the communications between your computer and the web server. Once you have Filezilla setup and connecting to the web server reliably you may want to turn this off [link to note - how to turn off].
The middle section itself is sub-divided into three sections, two on the left and one on the right. The two on the left represent the contents of your computer (Local Files), with the top part showing a file system tree that allows you to navigate your folders. When you select a folder in the top section, the contents are displayed in the bottom section.
The section on the right represents the contents of the web server (Remote site). Once you are connected to the web server, this will display the contents of your web space.
The bottom section is the "Transfer Queue." It shows the progress of files being uploaded to the web server. It also can safely be turned off once you get familiar with Filezilla [link to note - how to turn off].
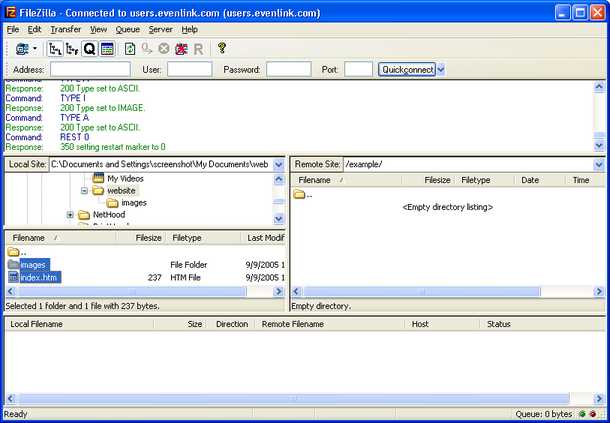
Let's get setup and connected. First, in the middle section, on the top part of the left side, navigate to your "website" folder. If you click the plus sign next to the website folder it will expand and show the sub-folder images. Finally, click on the "website" folder and you will see the contents (your index.htm file and the images folder) on the bottom part of the "Local Files" section.

Now we need to get connected to the web server. At the top, click on the "File" menu then click on "Site Manager."

This tool allows us to save the information needed to connect to the web server. Once you have it set up, you'll just have to make a couple of clicks and you'll be logged into your web space and ready to transfer files.
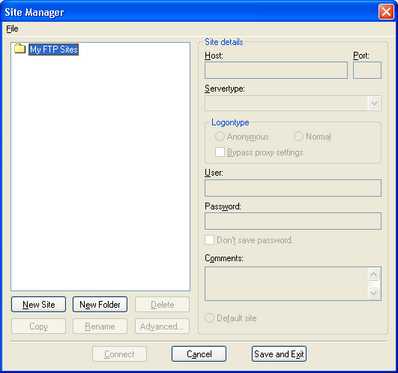
Click the "New Site" button. An icon will be added to the list and the text "New FTP site" will appear selected in box with a thin border. This means you can type the name of the server and it will replace the existing text with what you type.

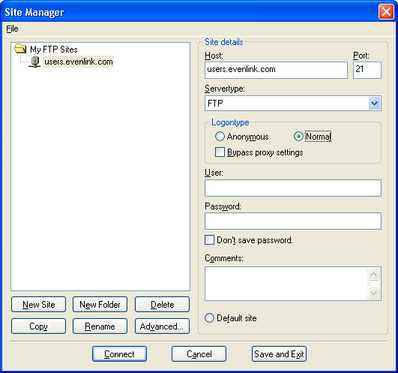
It is helpful to name the site by host name, but you can name it anything you like. I'll name it users.evenlink.com since that's the host we'll be connecting to.

Now let's type that host name into the "Host" box.

The "port" and "Servertype" are already filled in with the necessary values. But take a look at the "Logon type." It currently is set for "Anonymous." This is because an FTP program can also be used for downloading files from what are known as anonymous FTP servers. These types of servers allow anyone to download files (such as freeware and shareware programs for example) but usually not upload files. Since we want to upload files to our web server and a valid user name and password is required to do this, we need to change this.
Click on "Normal." This will make the "User" and "Password" boxes available.
Enter your user name (usually equivalent to your primary email address) in the "User" box. And enter your password (again, usually the same as your account's primary email address) in the "Password" box.
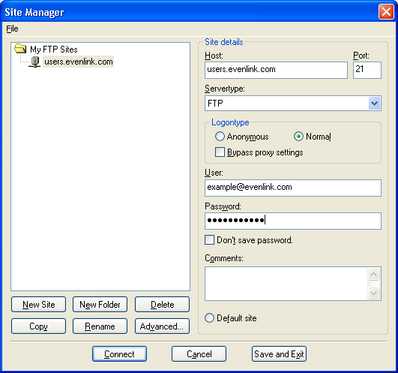
Press the "Connect" button. If all goes well you'll see the program connect and log you into the web server. If not, take a look at the messages in the top message section. This will usually tell you what went wrong. Look for something like "Invalid userid/password" or "Can't resolve hostname." The first one means either the information entered into the "User" box, or the information entered into the "Password" box is wrong. It doesn't specify which, so look at the "User" box first. If it's wrong then retype it and try again, otherwise retype the "Password." If you are getting the "Can't resolve hostname" error, then check and retype the information in the "Host" box. Finally, your window should look like this.

Now we are setup for transferring the files. Again, in the middle section, the left side represents the "Local Files" on your computer. The right side represents the contents of the web site. Our goal is to make them equivalent by transferring the files on the left, to the web space on the right. First we have to select the files on the left. You can transfer them one at a time, or all at once. We'll select them all and then upload them. In general, to select multiple items in the files system you hold down the control key on the keyboard (usually labeled CTRL), while clicking the files once with the mouse pointer. Files selected for transfer in this way will be highlighted (usually appearing blue). Release the CTRL key after you've selected all the files you want to transfer.
Now you can simply right-click on any one of the selected files and a context menu will appear.
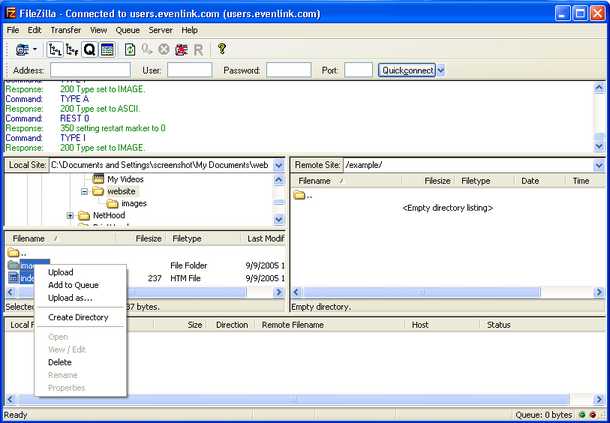
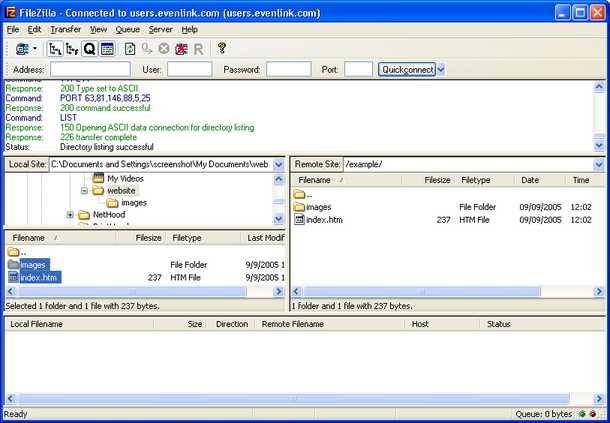
Click on "Upload." You'll see the files appear briefly in the "transfer queue" section below, and you'll see messages about the transfers taking place in the "messages" section above. After the transfer is finished, you'll see the files have appeared on the "Remote Site."
Guess what? Your website is now published on the Internet. Well done!