Now we are going to upload the site to the web server. You'll need to have your Internet connection on for this part, so go ahead and start it now.
When you are ready, click "File" then click "Publish Site."
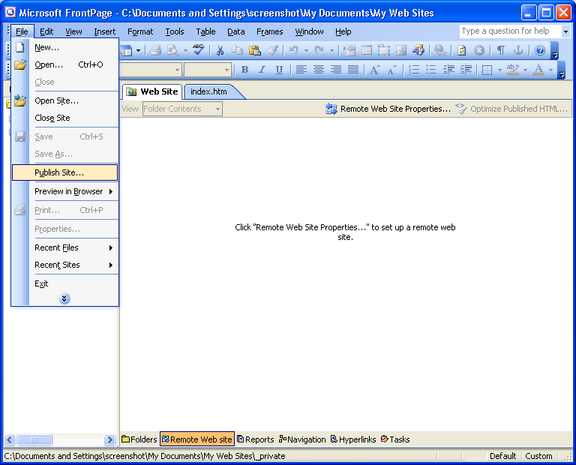
The first time you do this Frontpage will open the "Remote Web Site Properties" dialog. This will allow us to enter the settings for uploading. We'll only have to do this once.
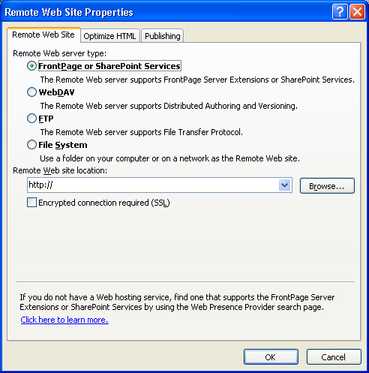
The first setting we'll need to change is the Remote Web server type. Click on the circle next to "FTP."
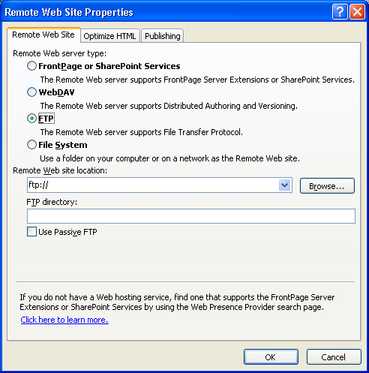
Now enter the FTP server host name (users.evenlink.com) after the "ftp://" in the Remote Web site location box. Leave the FTP directory box blank. The FTP server will automatically connect you to the correct directory based on your user name, which we'll be entering in a moment. Press the "OK" button.

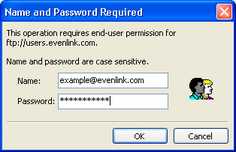
The Name and Password Required dialog should appear. If it doesn't or you get something else, check that your Internet connection is on.
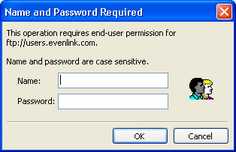
Fill in your FTP user name and FTP password in the appropriate boxes. When you have them in, press "OK."
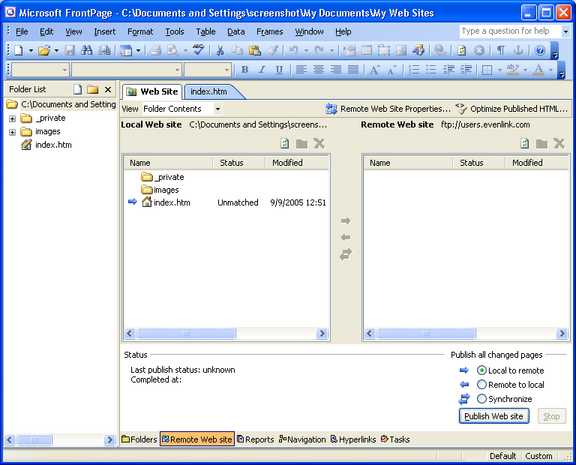
Once Frontpage connects, It will switch you to the "Web Site" tab. This tab displays the files on your computer, and on the web server at the same time. The left side shows the files on your computer, the right side shows the files on the web server. Publishing your site will have the effect of uploading the files from your computer to the web server.
Below the local and remote file listings there are three radio buttons labeled: Local to remote, Remote to local, and Synchronize. This will determine the direction of the transfer. You'll almost always want to publish from your computer, to the web server. So, make sure the dot is in the circle next to Local to remote.
Press the "Publish Web site" button. You'll see some messages appear in the Status area as the files are being uploaded.

When it is finished, you'll see that Local Web site and Remote Web site now have the same files. Guess what? Your website is now published on the Internet. Well done!