 Webmail
 Dynamic Mail
Calendar
evenlink.com understands that many of our customers have very busy lives, so we've included a new Calendar system in webmail. It's a very powerful tool that can help you make sure you keep track of your hectic schedule and never miss your appointments.
Creating a New Event
To create a new event, first we need to get to the Calendar section. Click the ![]() Calendar link in the side menu. By default, you'll be taken to the Monthly view of your calendar. But you probably don't have any events in your calendar yet, so click the click
Calendar link in the side menu. By default, you'll be taken to the Monthly view of your calendar. But you probably don't have any events in your calendar yet, so click the click ![]() New Event button at the top. You'll see the following page:
New Event button at the top. You'll see the following page:
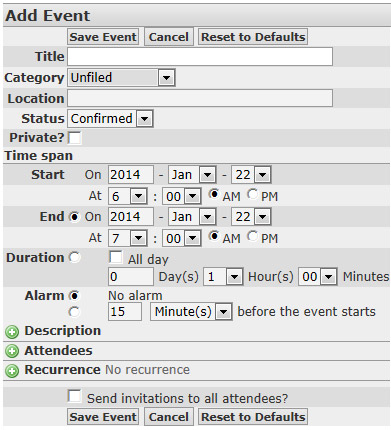
The Title textbox is where you can name the event. The Category option lets you group Events into a category. You can leave the task "Unfiled", or click the drop-down list to select a Category. You can also create a new category by clicking the "New Category" option. When you click the Save button, it will ask you for the new category name. The Status option lets you choose between: Free, Tentative, Confirmed, & Canceled. You can also set the privacy of the event.
The Time Span area lets you set the Start & End dates, and the Duration of the event. If you set an End date, the Duration is automatically filled in, and vice-versa. You can also expand the Description, Attendees, and Recurrence options by clicking the ![]() icon.
icon.
The Description option is simply just a description of the event.
The Attendees option is where you can add people who you know are going to attend the event. Expanding this option shows an Edit Attendees button. Clicking that button brings up the following page:
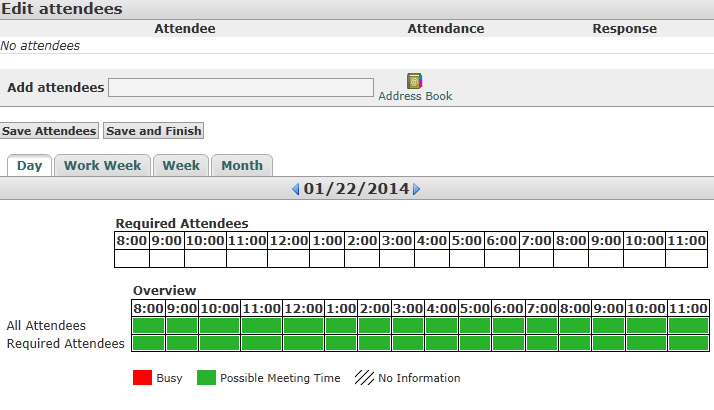
Attendees are added from your Address Book. In order for attendees to be added correctly, they need to also be using a Calendar feature in their mail system. This is because the Calendar needs to know their schedule to make sure the Event you're creating fits into their schedule. If they dont use a Calendar feature, then when you try to add the Attendee you'll get an error message because the system doesn't know if they're free to attend your event or not.
Below the attendees is your schedule, showing the times you are busy versus the times you are free. In this example, we have someone working 9:00am to 5:00pm, so those times are empty on the schedule. In the upper-left corner of the schedule area, you'll see Day, Work Week, Week, and Month tabs, which will show you your busy and free time for those periods of time.
The Recurrence option is where you can setup how often the event occurs. For example, if you add your work schedule to your calendar, instead of creating the same event over and over again, you can create one event, and set it to occur Weekly, every 1 week, on Mon-Fri (if you work a standard work schedule).
Viewing your Calendar
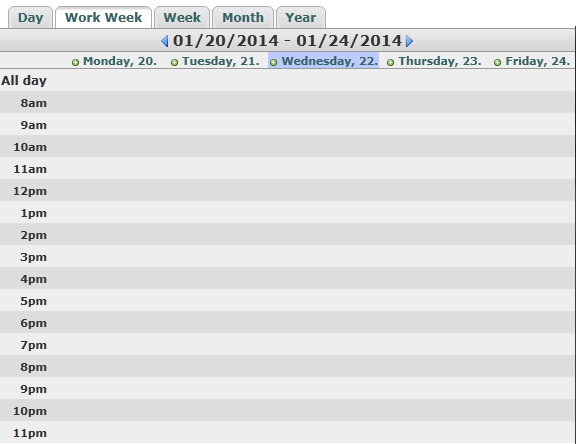
You can view your calendar in multiple ways, which is one of the reasons the Calendar tool is so powerful. You can go from viewing one single day to viewing an entire year. You can view your calendar by clicking the ![]() Today button at the top. For our example, we've setup a week of Work in our schedule, from Monday, May 12th to Friday, May 16th, from 9am to 5pm each day.
Today button at the top. For our example, we've setup a week of Work in our schedule, from Monday, May 12th to Friday, May 16th, from 9am to 5pm each day.
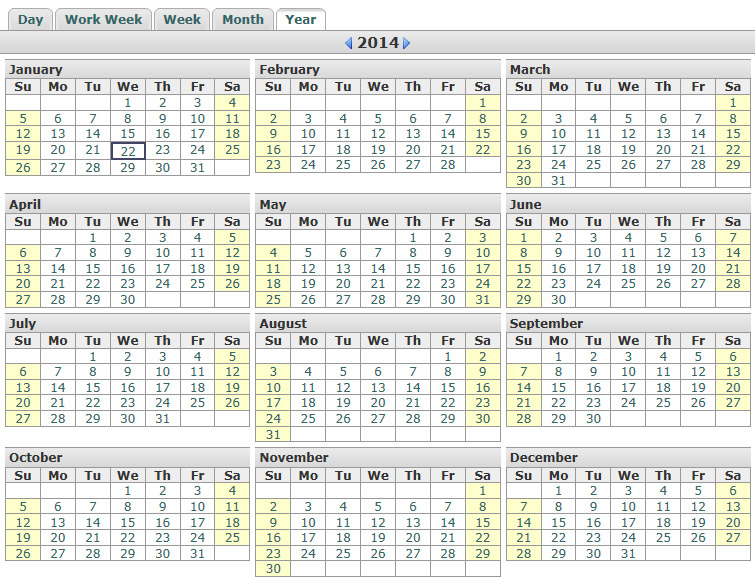
By default, you'll see the Monthly view. You can switch between views by clicking the tabs above the current view: Day, Work Week, Week, Month, Year. Here is what each one would look like in our example:
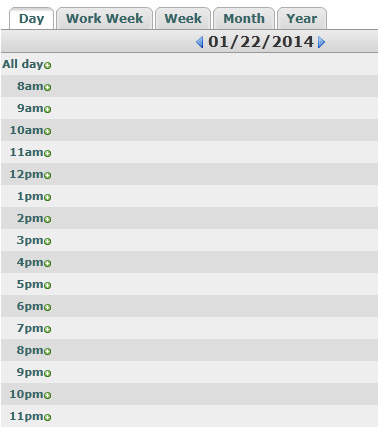

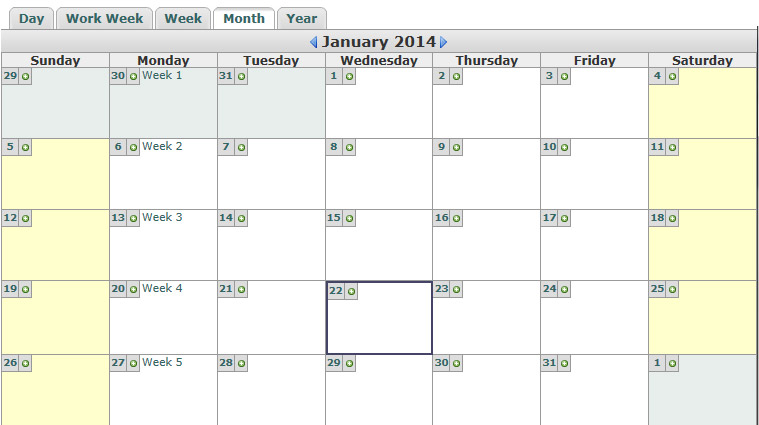
Every view, except the Year view, has a ![]() icon corresponding to each day in that view. Clicking that icon will let you add an event for that day.
icon corresponding to each day in that view. Clicking that icon will let you add an event for that day.
To go to a specific day, click the ![]() Goto button at the top. A small monthly calendar will come up, and you can cycle through the Year and Month. Clicking on a day will take you to the Day view of that day's events.
Goto button at the top. A small monthly calendar will come up, and you can cycle through the Year and Month. Clicking on a day will take you to the Day view of that day's events.
Viewing, Editing, and Deleting an Event
To view an event, look at any view except the Year view, and click its name in the Calendar. In the upper-left corner, you'll see the Category Name, Edit, Delete, and Export. Clicking Edit will show you the same options as when you added the event, and you can edit any option. Clicking Delete will let you Delete the Event.
If you setup an event that recurs, and you try to Edit or Delete it, you'll be asked if you want to make these changes to the Current Occurence, Future Occurences, or All Occurences. The Current Occurence is just the one you clicked on; Future Occurences is the one you clicked on, and all future ones; and All Occurences is the one you clicked on, ones in the future, and ones in the past.
Searching for an Event
To search for an event, click the ![]() Search button at the top. You'll see the following page:
Search button at the top. You'll see the following page:

Here you can enter text to search in the Title and Description, as well as how recent the event occured. Clicking Advanced Search in the upper-right lets you specify more search criteria, such as the Location, Status, and Time Span. Once you click the Search button at the bottom, your results will be shown underneath the Search area.
Multiple Calendars
You also have the ability to setup multiple Calendars. This could be useful if you want to seperate your Work events from your Personal events, for example. To create another Calendar, go back to a Calendar view by either expanding the ![]() Calendar link in the side menu, or by clicking the
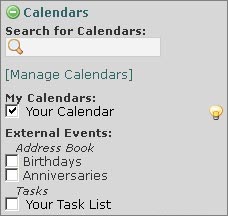
Calendar link in the side menu, or by clicking the ![]() Today button in the Button Area. On the right, you should see a menu that looks like:
Today button in the Button Area. On the right, you should see a menu that looks like:
Click the Manage Calendars link. You'll see a list of your Calendars, with a Create a New Local Calendar button at the top. Clicking this button will bring up a page asking you for a name and description. You have to type a name, but the description is optional. Once you've filled in the information, click the Create button, and the new Calendar will be created. You can manage this new Calendar just like you did before.
To switch between Calendars when viewing them, go back to a Calendar view and use the menu shown earlier. There are checkboxes at the bottom for each calendar. Check which ones you want to view and click the Save button. To makes changes to a Calendar, go back to the Manage Calendars page. To the right of each calendar, there are three icons: ![]()
![]()
![]() .
.
Clicking the ![]() icon will take you to the Edit Page, where you can change the name and description. Once you've finished making changes, click the Save button. Clicking the
icon will take you to the Edit Page, where you can change the name and description. Once you've finished making changes, click the Save button. Clicking the ![]() icon lets you change the permissions of the Calendar. And clicking the
icon lets you change the permissions of the Calendar. And clicking the ![]() icon will let you delete the Calendar. You'll be asked "Really delete the Calendar?". If you're sure, click the Delete button.
icon will let you delete the Calendar. You'll be asked "Really delete the Calendar?". If you're sure, click the Delete button.
Printing Calendars and Events
You can also print any view of the calendar, or a specific event. Click the view you wish to print, and then click the Print button in the Button Area. A new window will come up with a printable version, as well as a Print dialog window:
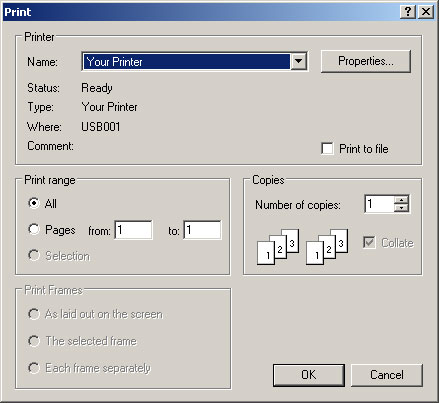
Click OK to print, or click Cancel if you've changed your mind.